Ever wondered how those stunning glass balustrades transform ordinary spaces into something spectacular? Are you thinking about adding that touch of modern elegance to your home but worried about the installation process? What if we told you that installing a glass balustrade doesn’t have to be a nightmare?
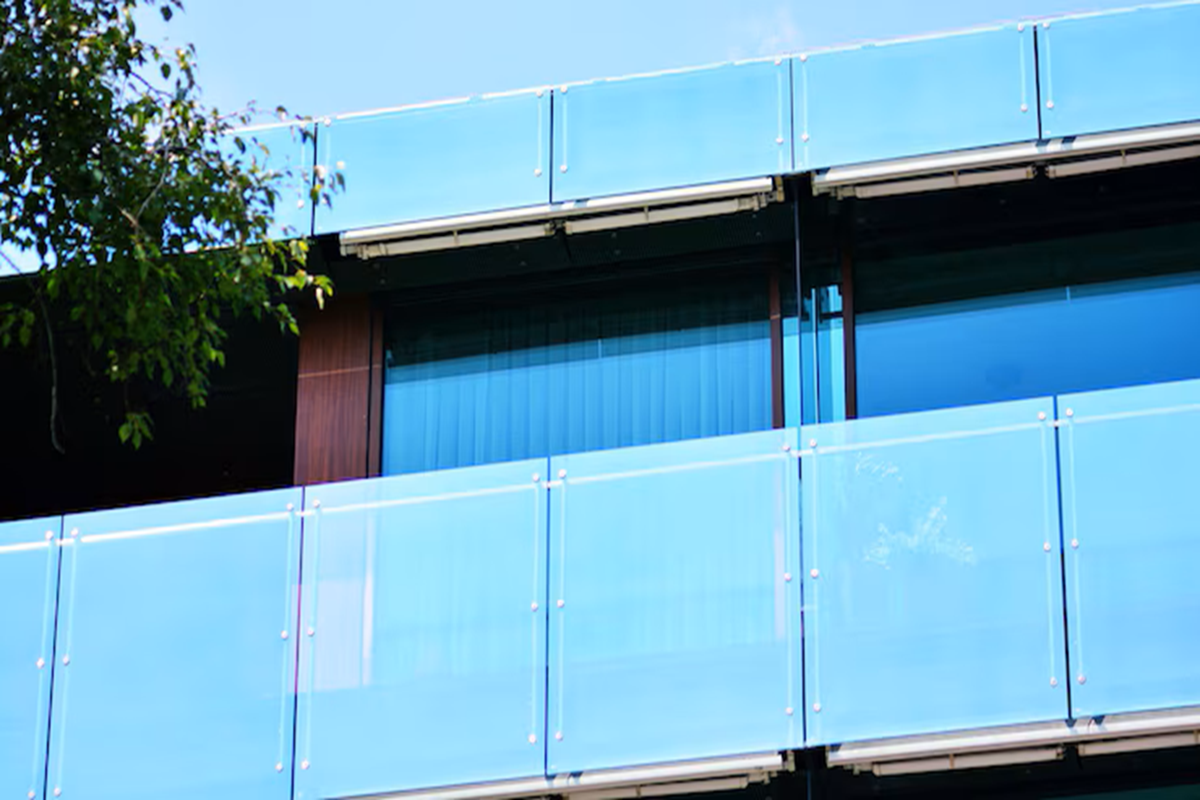
Glass balustrades have become increasingly popular across Australia, and it’s easy to see why. They offer unobstructed views, create a sense of space, and add a contemporary feel to any property. Whether you’re planning to upgrade your balcony, staircase, or pool area, a glass balustrade can completely transform the look and feel of your space.
In this guide, we’ll walk you through everything you need to know about glass balustrade installation. From the essential tools and materials to step-by-step instructions, common pitfalls to avoid, and maintenance tips to keep your investment looking pristine for years to come. By the end of this article, you’ll have the confidence and knowledge to tackle this project yourself or understand exactly what’s involved if you decide to hire professionals.
Why Glass Balustrades Are Worth the Investment
When it comes to home improvements that offer both aesthetic appeal and practical benefits, glass balustrades sit at the top of the list. They’re not just about looks – though they certainly deliver on that front. These modern barriers provide safety without sacrificing your view, making them perfect for showcasing beautiful landscapes or maintaining visual flow throughout your home.
The value they add to your property is substantial. Real estate agents consistently report that homes featuring glass balustrades attract more interest and often command higher prices. It’s an investment that pays dividends, both in terms of daily enjoyment and long-term property value. Plus, unlike timber or metal alternatives, glass won’t rot, rust, or require regular painting.
What You’ll Need Before Starting Your Glass Balustrade Installation
Before you dive into your installation project, gathering the right tools and materials is essential. Having everything on hand will save you countless trips to the hardware store and help the installation process flow smoothly. Here’s what you’ll need to get started:
Essential Tools:
- Drill with masonry bits
- Spirit level (at least 1 metre long)
- Measuring tape
- Pencil or chalk for marking
- Safety glasses and gloves
- Hammer drill for concrete surfaces
- Allen keys or spanners
- String line for alignment
Materials Required:
- Glass panels (tempered safety glass)
- Posts or spigots
- Base plates or channels
- Stainless steel fixings
- Chemical anchors or expansion bolts
- Rubber gaskets or wedges
- Silicone sealant
- Handrail (if required)
Remember to check your local building codes before purchasing materials. Different areas have specific requirements for glass thickness, handrail heights, and gap specifications. It’s worth investing in quality components – cutting corners on materials could compromise both safety and longevity.
Is It Safe to Install a Glass Balustrade Yourself?
This is probably the most important question to address, and the answer isn’t straightforward. While DIY installation is possible for those with good practical skills and attention to detail, it’s not a project to take lightly. Glass panels are heavy, fragile during installation, and mistakes can be costly – both financially and in terms of safety.
Step-by-Step Glass Balustrade Installation Guide
Installing the Posts
Begin by drilling holes for your posts according to your marked positions. For concrete surfaces, use a hammer drill with the appropriate masonry bit. The holes should be slightly deeper than your anchor bolts to allow for adjustment. Clean out all dust and debris from the holes using a brush or compressed air.
Securing the Base
Insert chemical anchors or expansion bolts into the drilled holes. If using chemical anchors, follow the manufacturer’s instructions carefully regarding mixing and curing times. Position your posts or base channels, checking they’re perfectly vertical with your spirit level. Tighten the fixings gradually, rechecking alignment as you go.
Installing Glass Panels
This is where that helper becomes essential. Carefully lift each glass panel into position, starting from one end. Use rubber gaskets or setting blocks to cushion the glass and maintain consistent gaps. Most systems use clamps or brackets to secure the glass to posts. Tighten these evenly, avoiding over-tightening which could stress the glass. Apply silicone sealant to weatherproof joints and create a professional finish.
How Long Does It Take to Install a Glass Balustrade?
The timeline for installation varies considerably based on the project’s complexity and your experience level. A straightforward balcony installation might take a competent DIYer a weekend, while a multi-level staircase could require several weekends of work.
For a typical 10-metre straight run, expect to spend 4-6 hours on preparation and marking out, 3-4 hours installing posts and base fixings, and another 4-6 hours fitting glass panels and finishing touches. Factor in drying time for chemical anchors and sealants – rushing these processes will compromise the installation’s integrity.
Post-Installation Checks and Finishing Touches
The finishing touches make all the difference to the final appearance. Clean away any excess sealant with a suitable solvent before it fully cures. Polish the glass with a quality glass cleaner to remove fingerprints and construction residue. If you’ve installed a handrail, verify it’s at the correct height and securely fixed.
Maintenance Tips to Keep Your Glass Balustrade Looking New
One of the best things about glass balustrades is their low maintenance requirements. However, “low maintenance” doesn’t mean “no maintenance”. Regular cleaning will keep your investment looking spectacular and help you spot any potential issues early.
For routine cleaning, warm soapy water and a soft cloth or squeegee work perfectly. Avoid abrasive cleaners or rough materials that could scratch the glass surface. In coastal areas, more frequent cleaning helps prevent salt build-up, which can etch glass over time. A monthly wash should suffice for most locations, increasing to fortnightly near the ocean.
Conclusion
Congratulations! If you’ve made it this far, you’re now equipped with the knowledge to install a glass balustrade safely and successfully. Whether you choose to tackle the project yourself or hire professionals, understanding the process helps ensure you get the results you’re after.
The transformation a glass balustrade brings to a space is truly remarkable. You’ll find yourself appreciating views you might have taken for granted, and your property will have gained both aesthetic appeal and monetary value. The sense of achievement from completing such a significant project yourself is an added bonus that money can’t buy.
Remember, there’s no shame in calling in professionals if you encounter difficulties or feel overwhelmed. The most important thing is that your balustrade is installed safely and correctly. Here’s to many years of enjoying your beautiful new glass balustrade – may it bring you joy every time you look through its crystal-clear panels!